
Step-by-step image color correction tutorial on Photoshop’s correcting an image’s overall color cast.
Color Correction to Remove Unwanted Color Casts
This basic Photoshop image color correction tutorial instructs on color correction methods using Adobe Photoshop’s image adjustment filters to correct unwanted color-casts that are created from improper white-balance setting in the camera, or unusual lighting conditions which overwhelm the natural image color correction of a scene. While correcting these undesirable color-casts you will also be able to improve the color saturation levels, making a dull photo pop with contrast and color.
Two of the most effective tools for accomplishing image color correction on photographs with unwanted color casts, are the “Curves” tool (Command>M), and the “Color Balance” tool (Command>B). Both of these tools are capable of globally altering the photograph’s hue, without destroying pixel information. The ‘Hue/Saturation’ tool should be avoided because when you change the hue to fix the green color (say to add yellow to the green), your reds will shift in the opposite direction, throwing them out of balance. The idea is to only effect the unwanted color, and leave any image color correction as they are.
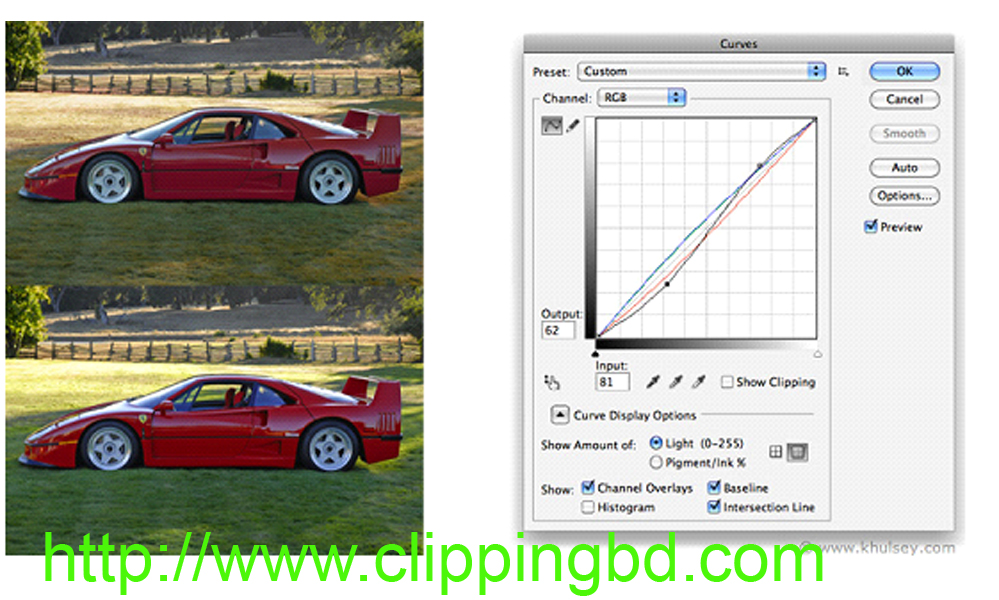
With Photoshop’s Curves adjustment filter you can alter color in each of the three RGB channels or four CMYK channels, by simply dragging the diagonal line’s anchor point. You can also add new anchor points to make subtle adjustments in specific tonal regions.
If the Curves filter is too complicated you can use the Color correction adjustment to make global alterations. To use Color Balance you will drag each slider bar to affect the overall color tint (hue) in the shadows, mid-tones, and highlights of the photograph.
Technical Note: Always check your monitor calibration before making adjustments to your photograph. If your monitor is not properly calibrated, you may be making adjustments that are actually hurting the photo’s color balance.
Color Correction Basics
Step 1: Always save a backup copy of your photo before you begin any color adjustments. When you are ready to begin, copy and paste the background layer into a couple of new layers, and only make your image color correction to the new duplicate layers.
Step 2: Although I would never rely on automatic image color correction functions such as “Auto Levels,” “Auto Contrast,” or “Auto Color,” (found in the top menu-bar under Image>Adjustments), it is always a good idea to try these to see what the Photoshop program comes up with. It can serve as more of an FYI than anything else, and it gives you a starting point. You can apply these filters to an adjustment layer or copy-and-paste the background layer into a new layer and make your adjustment to it. Then you can dial it back a bit by adjusting the layer’s Opacity.
Step 3: Always limit your image color correction to a single step on each of the unadulterated layers. You can label each layer with the step that was taken, and soften each individual effect using the layer’s “Opacity” setting.
Keep in mind that you are shooting for realistic overall color, and any adjustments should look natural and convincing. Keep a separate copy of the original photograph open on your desktop, so that you can compare the adjusted copy to it. There should be no obvious coloration to the adjusted copy. Do not attempt to solve darkness or brightness issues by adjusting color. We will cover Brightness and Contrast issues in a separate tutorial.
Note: The following hardware and software was used in this tutorial: An Apple Mac Pro desktop computer, a Wacom Intuos 6×8 drawing tablet, Adobe Photoshop CS-CS5 photo editing software and a properly calibrated monitor.